
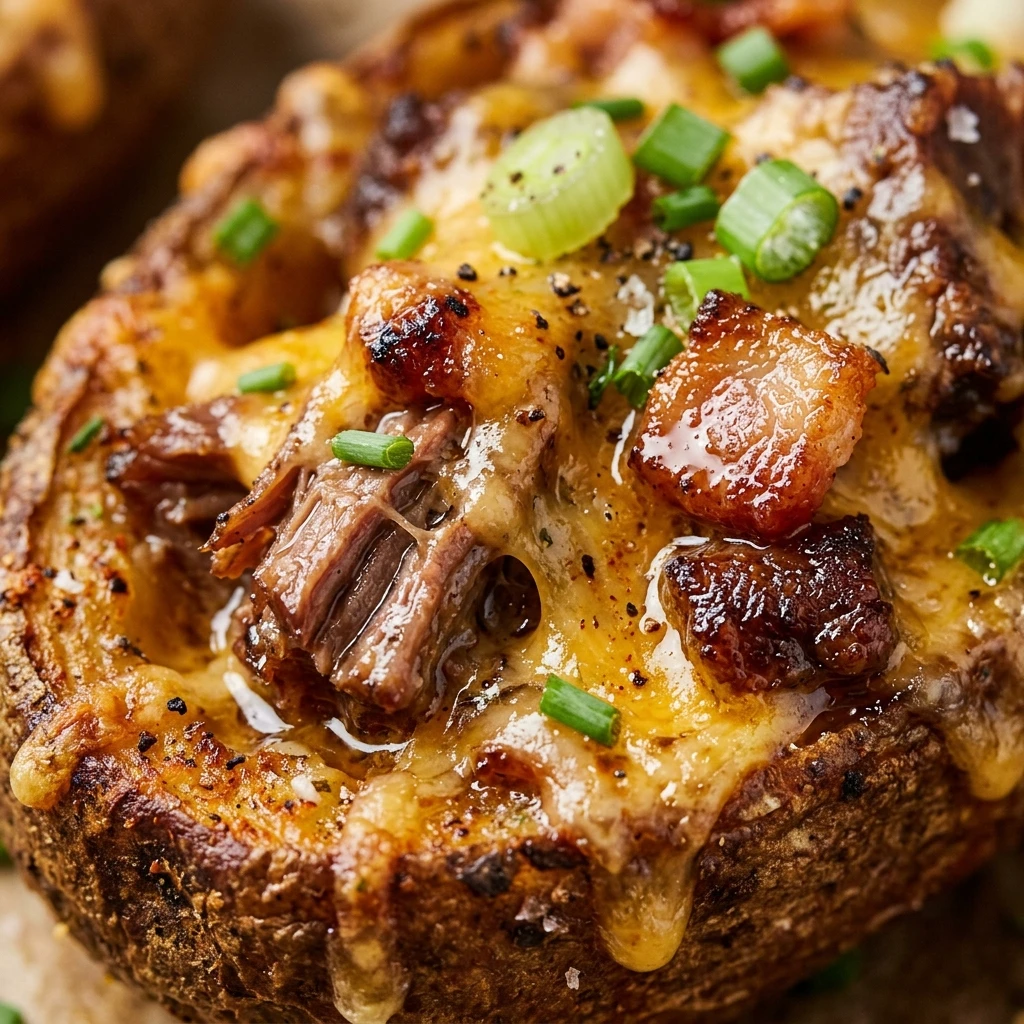

There is nothing quite like the combination of crispy potato skins and savory, seasoned beef. Whether you are hosting a game day party or looking for a fun family dinner, beef potato skins are always a crowd-pleaser. They offer the perfect balance of a crunchy exterior and a hearty, cheesy filling that satisfies every craving.
This recipe transforms the humble russet potato into a gourmet appetizer. By twice-baking the potatoes, you achieve a restaurant-quality crunch that holds up perfectly to the weight of the beef and melted cheese. Let’s dive into how you can make these delicious treats right in your own kitchen.
Recipe Information
- Prep Time: 20 minutes
- Cook Time: 60 minutes
- Total Time: 80 minutes
- Servings: 4 servings
- Difficulty Level: Easy
Nutrition Information
- Calories per serving: 420 kcal
- Protein: 24g
- Carbohydrates: 32g
- Fat: 22g
- Fiber: 4g
- Sugar: 2g
- Sodium: 580mg
Why Make This Beef Potato Skins
You should make these beef potato skins because they are incredibly versatile and easy to customize. Unlike standard potato skins that only feature bacon, adding ground beef turns this appetizer into a filling snack or even a light meal. The protein from the beef makes them much more satisfying for hungry guests.
Furthermore, this recipe is a fantastic way to use up leftover ingredients. If you have a small amount of ground beef or steak from a previous dinner, you can easily repurpose it here. It is a budget-friendly dish that looks and tastes like a high-end pub favorite.
How to Make Beef Potato Skins
Making these skins is a simple process that involves baking, scooping, and broiling. Follow these easy steps to ensure your potatoes are crispy on the outside and flavorful on the inside.
Ingredients
- 4 large russet potatoes, scrubbed clean
- 1 lb lean ground beef
- 1 tablespoon olive oil
- 1 teaspoon salt
- 1/2 teaspoon black pepper
- 1 teaspoon garlic powder
- 1 1/2 cups shredded cheddar cheese
- 1/2 cup sour cream (for topping)
- 1/4 cup sliced green onions
- Optional: Jalapeño slices for a kick
Directions
Step 1: Bake the Potatoes
Preheat your oven to 400°F (200°C). Pierce the potatoes several times with a fork and rub them lightly with olive oil. Place them directly on the oven rack and bake for 50 to 60 minutes, or until the insides are tender when poked with a knife.
Step 2: Brown the Beef
While the potatoes are baking, place a skillet over medium-high heat. Add the ground beef and cook until browned, breaking it into small crumbles with a spatula. Drain any excess grease. Season the beef with salt, pepper, and garlic powder, then set aside.
Step 3: Scoop the Potatoes
Once the potatoes are cool enough to handle, cut them in half lengthwise. Use a spoon to scoop out the flesh, leaving about a 1/4-inch thick shell of potato against the skin. Save the scooped-out potato for mashed potatoes later!
Step 4: Crisp the Skins
Increase the oven heat to 425°F (220°C). Brush the inside and outside of the potato shells with a little more olive oil and sprinkle with a pinch of salt. Place them hollow-side down on a baking sheet and bake for 5 minutes. Flip them over and bake for another 5 minutes until the edges are crispy.
Step 5: Fill and Melt
Fill each crispy potato shell with a generous amount of the seasoned ground beef. Top each one with plenty of shredded cheddar cheese. Return the tray to the oven for 3 to 5 minutes, or until the cheese is bubbly and melted.
Step 6: Add Toppings
Remove the potato skins from the oven. Top each one with a dollop of sour cream and a sprinkle of fresh green onions before serving warm.
How to Serve Beef Potato Skins
Serve these beef potato skins on a large platter while they are still hot. They pair perfectly with a side of cool ranch dressing or a zesty salsa for dipping. For a full meal, you can serve them alongside a crisp garden salad or a bowl of vegetable soup.
How to Store Beef Potato Skins
Store any leftover potato skins in an airtight container in the refrigerator for up to 3 days. To maintain the crispiness when reheating, use an oven or an air fryer at 350°F until they are heated through. Avoid using the microwave, as it can make the potato skins soggy.
Expert Tips for Perfect Beef Potato Skins
For the best results, always use Russet potatoes. Their thick skin becomes much crispier than red or gold potatoes. Additionally, make sure to drain your ground beef thoroughly before stuffing the skins to prevent them from becoming greasy. If you want an extra crunch, you can broil the cheese-topped skins for the last 60 seconds of cooking.

Delicious Variations
You can easily change the flavor profile of this dish. Try “Taco Style” by adding taco seasoning to the beef and topping with diced tomatoes and cilantro. Or, go for a “Philly Cheesesteak” version by using thinly sliced steak, sautéed peppers, and provolone cheese instead of cheddar.
Frequently Asked Questions
Q: Can I make these ahead of time?
Yes! You can bake and scoop the potatoes a day in advance. Store the shells and the cooked beef separately in the fridge, then assemble and do the final bake when you are ready to serve.
Q: What are the best potatoes to use?
Russet potatoes are the best choice because they have a high starch content and thick skins that crisp up beautifully in the oven.
Q: Can I freeze beef potato skins?
Yes, you can freeze them after the final bake. Let them cool completely, then freeze in a single layer before transferring to a freezer bag. Reheat directly from frozen in the oven.
Q: How do I keep the skins from falling apart?
Make sure to leave at least 1/4 inch of potato flesh inside the skin. If you scoop too much out, the skin will become too thin and fragile to hold the beef.
Q: Can I use other types of meat?
Absolutely. Shredded chicken, pulled pork, or even ground turkey work great as substitutes for ground beef.
Conclusion
Beef potato skins are a classic comfort food that never goes out of style. With their crunchy exterior and savory beef filling, they are sure to be a hit at your next gathering. Give this recipe a try and enjoy a delicious, homemade version of this beloved appetizer!

Beef Potato Skins

- Cook Time: 80 minutes
- Total Time: 1 hour 20 minutes
Ingredients
- 4 large russet potatoes, scrubbed clean
- 1 lb lean ground beef
- 1 tablespoon olive oil
- 1 teaspoon salt
- 1/2 teaspoon black pepper
- 1 teaspoon garlic powder
- 1 1/2 cups shredded cheddar cheese
- 1/2 cup sour cream (for topping)
- 1/4 cup sliced green onions
- Optional: Jalapeño slices for a kick
Instructions
- Preheat your oven to 400°F (200°C). Pierce the potatoes several times with a fork and rub them lightly with olive oil. Place them directly on the oven rack and bake for 50 to 60 minutes, or until the insides are tender when poked with a knife.
- While the potatoes are baking, place a skillet over medium-high heat. Add the ground beef and cook until browned, breaking it into small crumbles with a spatula. Drain any excess grease. Season the beef with salt, pepper, and garlic powder, then set aside.
- Once the potatoes are cool enough to handle, cut them in half lengthwise. Use a spoon to scoop out the flesh, leaving about a 1/4-inch thick shell of potato against the skin. Save the scooped-out potato for mashed potatoes later!
- Increase the oven heat to 425°F (220°C). Brush the inside and outside of the potato shells with a little more olive oil and sprinkle with a pinch of salt. Place them hollow-side down on a baking sheet and bake for 5 minutes. Flip them over and bake for another 5 minutes until the edges are crispy.
- Fill each crispy potato shell with a generous amount of the seasoned ground beef. Top each one with plenty of shredded cheddar cheese. Return the tray to the oven for 3 to 5 minutes, or until the cheese is bubbly and melted.
- Remove the potato skins from the oven. Top each one with a dollop of sour cream and a sprinkle of fresh green onions before serving warm.